

If you are learning how to organize a mushroom grow room on shelving, your real decision is not which rack looks nice. It is how to place colonization, fruiting and harvest zones so airflow stays steady, humidity stays where you want it and daily checks stay simple. Your species, batch size, budget and experience level will shape every choice, from open wire units to enclosed tents set over racks.
A small closet setup needs a different plan than a dedicated room with several shelves running at once. In this guide updated for November 2026, we prioritized criteria that affect contamination risk and workflow, not looks. You can browse more ideas in the Grow Tents, Racks and Shelving archive as you plan your layout around the containers you already use.
What Actually Matters
Airflow and Humidity by Shelf Height
Warm air lifts and moist air tends to settle, so the upper shelf often runs a touch warmer and drier while lower shelves stay cooler and damper. You can use that gradient on purpose. Keep colonizing bags or jars where temperature stays steady and out of direct mist, and save the zone with fresh air exchange and even humidity for fruiting. Leave open gaps at the sides and front so air can move around each bag or tub instead of getting trapped behind plastic.
Avoid pushing containers wall to wall. When shelves are packed tight, carbon dioxide pools around developing caps and you get leggy stems and fuzzy feet. Growers commonly report better results when each shelf has breathing room on all sides and a small fan nearby moves room air gently without blowing directly on pins. If you use a tent or plastic enclosure, route intake low and exhaust high so the whole rack breathes as one column.
Cleanability and Stability Under Load
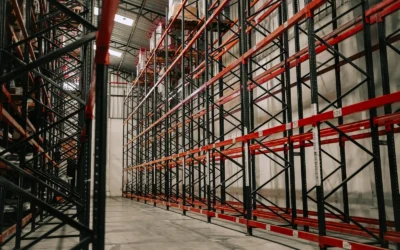
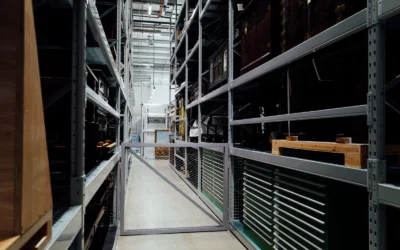
Shelving in a grow room lives in constant humidity, so choose surfaces you can wipe down fast. Open wire lets water drip through and dries quickly, while solid shelves hold puddles unless you add trays or liners. Either style works if you add a washable tray under each fruiting block and wipe spills the same day. That simple habit does more for clean harvests than any special coating.
Stability matters more than it seems. Bags with moist grain and substrate feel dense and shift weight as they colonize, and tubs get heavier after hydration. Set heavier items low and centered, keep the unit level, and avoid leaning towers of tubs that block your view. For background on enclosed fruiting options that often sit on racks, see the overview of Monotubs, Martha Tents and Fruiting Chambers before you decide between open air and a tented shelf.
Light, Reach and Daily Routine
You will check your grow daily, so design for your arms and eyes. Put items you inspect often at chest to eye level, such as fresh pins and bags near full colonization. Reserve very high or very low spots for sealed colonization or supplies. A small, indirect light on a regular day and night rhythm is enough for most gourmet species to orient, you do not need bright grow lights blasting each shelf.
Label everything facing outward with species and inoculation date so you can scan without moving bags. Keep a little front clearance to lift a bag, fan a tub or harvest a cluster without dragging it across neighbors. If you have to pull several containers to reach one, your layout is too deep or too crowded and contamination risk climbs every time you shuffle things around.
Fit for Your Species and Batch Size
Different mushrooms ask for different shelf space. Oysters and lions mane like generous fresh air and room for caps to expand outward, while smaller top fruiting blocks can sit closer together. Think in terms of footprint and fruiting clearance rather than shelf count. A roomy block that fruits from the side needs empty air in front, while a tub that fruits from the top needs headroom above for caps to lift without touching the next shelf.
Match shelf zones to batch size and experience. Beginners do well with a single shelf divided into a calm colonization corner and an airy fruiting corner, so you learn to read conditions without juggling multiple microclimates. Larger batches deserve separation, with one area for sealed incubation and another for open fruiting and harvest, plus a small staging spot for cleaning tools and packing harvests.
To make these ideas concrete, here are a few options that show the range of container styles that live on grow room shelving, from compact all in one bags to larger bulk setups:
This article contains affiliate links. If you buy through one of our links, FungiPop may earn a commission at no extra cost to you. Commissions never influence which products we recommend or how we rank them. Read our Affiliate Disclosure for details.
Quick Picks at a Glance

Zombie Mushrooms All-in-One Grow Kit 3lb
As an Amazon Associate we earn from qualifying purchases. Product prices and availability are accurate as of the date/time indicated.
Pros
- True all-in-one convenience with sterilized grain and substrate ready to inoculate
- Self-healing injection port simplifies the process and helps prevent contamination
- Compact, enclosed design needs no monotub, tent or dedicated grow room
- 3lb size offers strong colonization potential and multiple flushes for home use
Cons
- Spores or liquid culture are not included and must be purchased separately
- Single bag format limits harvest size compared to larger tubs or multiple bags
- Success still depends on proper sterile technique and correct fruiting conditions
The Zombie Mushrooms All-in-One Grow Kit is a 3lb mini bag that combines sterilized milo grain and CVG substrate in one sealed system. It is built for beginners, apartment growers and anyone who wants to skip building monotubs and bulk bins.
You simply inject spores or liquid culture through the self-healing port, let the grain fully colonize, then move to fruiting conditions for flushes. The larger 3lb fill gives the mycelium plenty of nutrition to support vigorous growth and satisfying yields at home.
The enclosed bag design feels practical and clean, with no cooking, hydrating or mixing required. The compact 5 x 3 x 5 inch form keeps everything contained, which helps reduce mess and exposure to contaminants in normal rooms.
The main tradeoff is that spores are not included, so you must source genetics separately and learn basic sterile technique. As a single bag system, it is also not meant for large scale production and you will need multiple bags to scale up.
Overall, this is a smart, low effort entry point for home mushroom growing with minimal gear. If you want a tidy, beginner friendly bag that handles grain and substrate in one step, this kit is an excellent fit.
Brand: Zombie Mushrooms, Size: 1-Pack 3lb mini bag, Color: Brown, Dimensions: 5 x 3 x 5 inches.
Includes: Pre-sterilized milo grain, CVG coconut coir substrate, built-in self-healing injection port.
Requires: Mushroom spores or liquid culture purchased separately, plus basic fruiting conditions for the final stage.
Start by wiping the injection port and inoculating with spores or liquid culture using a sterile syringe. Keep the bag in a warm, dark place and allow full colonization before doing anything else.
Once the grain and substrate are fully colonized, introduce fresh air, light and humidity for fruiting. Mist as needed and allow mushrooms to develop, then harvest and maintain moisture for additional flushes.
This kit works best for patient beginners who can maintain clean handling and stable conditions. For continuous harvests, plan to run multiple bags in rotation.
Matching Gear to Your Grow
Start with the containers you already own, then arrange shelving around them. Shelves do not fruit mushrooms by themselves, they create the airflow, humidity zones and access that let bags and tubs perform. The scenarios below show how to apply that thinking without overbuilding.
If you grow in a closet or corner with all in one bags, keep it simple. The Zombie Mushrooms All-in-One Mushroom Grow Kit is a useful example because the 3lb bag combines sterilized grain and substrate with a self healing injection port, so it moves from inoculation to fruiting in the same pouch. Give each bag its own tray on a middle shelf where you can see the injection port and colonization progress without lifting. Leave air space in front for side pins to expand, and keep mist and fans off to the side. Note the limits, spores are not included and each bag supports a limited number of flushes compared with larger bulk tubs, so plan shelf space for rotation rather than permanent storage.
If you run a spare room with mixed bags and bulk tubs, split the rack by stage. Use a lower, stable shelf for tubs that need still air and darkness during colonization, and an upper, airy shelf for fruiting blocks that need light and gas exchange. Keep lids, liners and harvest tools on a separate clean shelf so you are not reaching over open tubs. Our notes with ideas for setting up a monotub kit can help you decide how much top clearance and side access to leave for tubs that sit beside bags on the same unit.
If you enclose a rack with plastic and add humidity, treat the whole shelf as one tent. Place the humidifier outlet so fog drifts across the shelf rather than blasting one bag, and use a small circulation fan to prevent wet spots. This is where a humidifier comparison for Martha tents helps you choose output and placement that suits open racks versus tighter enclosures. Keep electronics off the shelf floor, route cords up and away from mist, and leave a service lane in front so you can wipe walls and empty drip trays without moving every block.
Common Mistakes
Packing shelves edge to edge. When you fill every inch, air stalls, moisture collects under bags and pins stretch toward any gap. You will see slower pin sets and more aborts. Leave side and front channels open, stagger bags so faces do not touch, and remove empty containers promptly to restore flow.
Placing a humidifier too close to a fresh flush. Direct fog soaks caps and invites bacterial blotch, which shows as yellow to brown spots and slimy patches. Keep the outlet back from the shelf, aim for indirect drift, and check that caps dry lightly between mist cycles. If one shelf stays wet while others look fine, move that block or adjust the duct before the whole flush suffers.
Mixing dirty and clean tasks on the same shelf. Opening grain bags, handling spent substrate and harvesting in one spot spreads contaminants to ready to fruit blocks. Skipping a proper sterile transfer step during inoculation makes this worse, since weak spawn then sits beside healthy tubs. Keep an inoculation and inspection zone apart from fruiting, wipe hands and tools between zones, and never set a used tray on top of a colonizing bag.
Who Should Wait or Buy Differently
A full shelving reorganization is not ideal for you if your grow is still changing size every few weeks or you have not settled on bags versus tubs. In that case, run a minimal single shelf trial, learn your room humidity and temperature swings, and save larger racks, tents and accessories for later. Renters with strict moisture rules, very tight closets with no ventilation path, or growers who only run an occasional small bag are not a good fit for tall multi shelf builds and should choose a compact cart or tabletop spot with easy cleaning instead.
Frequently Asked Questions
How much clearance should I leave above fruiting bags on a shelf?
Leave generous headroom so caps can expand and air can sweep across the tops without trapping moisture. For a compact 3lb style bag, that means enough open air to lift the bag, inspect the top and harvest side clusters without scraping the shelf above. If caps touch the next shelf or plastic, raise the shelf or move that block to a roomier level.
Should colonization and fruiting share the same shelving unit?
They can share a unit if you separate them by zone and keep airflow in mind. Place sealed colonizing bags in a calmer, darker corner away from mist and harvest activity, and place fruiting blocks where fresh air and indirect light reach them. If you see repeated contamination or stalled pins, give colonization its own shelf or bin until conditions stabilize.
How do I keep shelves clean in a humid grow room?
Use washable trays or liners under every block and tub, and wipe spills the same day so sugars and substrate bits do not feed mold. Pull containers forward weekly to wipe the shelf surface and check for pooled water near posts and corners. Good drainage, gentle circulation and a short daily wipe routine will keep wire and solid shelves serviceable for many cycles.






Write Your Review
No reviews yet. Be the first to share your experience!