
As of November 2026, if you are growing oysters on a kit, bucket, or tent, the big decision is not which strain sounds fun, it is when to pull the cluster for the best texture and the cleanest second flush. Pick too early and you lose yield, pick too late and caps turn thin, pale, and dusty with spores. This buying guide walks through how to know when to harvest oyster mushrooms by sight, touch, and timing cues you can check daily.
You will weigh four main variables as you learn: the species being grown, your batch size, your budget for references and tools, and your experience level with indoor fruiting. Blue, pearl, pink, and king oysters all show slightly different cap signals, and a single countertop kit needs a simpler approach than a weekly rotation. For broader context on handling fresh picks, browse our Harvesting, Drying and Storage guides alongside this framework.
What Actually Matters
Cap Shape and Edge Curl
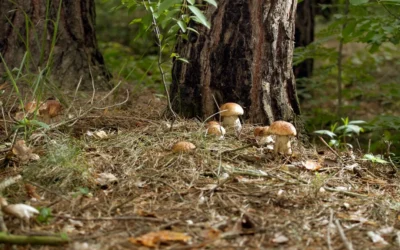
Cap shape is your most reliable daily cue. Young oyster caps start rounded or slightly cupped with edges that curl under, then they flatten and lift as they mature. You want to harvest while most caps in the cluster are still slightly cupped with firm, thick flesh, not paper thin and fully upturned.
Check the whole cluster, not just the largest cap. Growers commonly report that prime blue and pearl oyster caps measure a few inches across at harvest, with the outer edge just starting to flatten. If the smallest pins are still tiny but the large caps are already wavy and cracking, it is better to harvest now than to wait for every pin to catch up.
Spore Drop, Gill Color, and Smell
Mature oysters release a fine white to light gray spore dust that coats caps below, shelves, and tent walls. If you see a powdery layer each morning or your fingers come away dusty after a light touch, the cluster has moved past peak tenderness. A strong, sweet, almost fishy odor is another late sign, while fresh oysters smell mild, earthy, and clean.
Gill color helps confirm what you see on top. Fresh gills look white to cream and feel dry, not slimy or darkened at the edges. Heavy spore load also makes cleanup harder and can irritate airways in a closed room, so good airflow and regular checks matter. If humidity stays too high around mature clusters, review how to prevent mold from too much humidity before your next flush.
Cluster Size and Your Batch Goals
Your batch size changes what perfect timing means. For a single kit you eat fresh, you can let the cluster fill out one more day for a fuller pan, as long as edges stay curled under. For weekly cooking plus drying, you may harvest a touch earlier when flesh is denser, which slices cleaner and stores better.
Track temperature and humidity near the fruiting zone so your timing gets more consistent from flush to flush. Growers commonly report steadier results when daytime conditions stay in a cool, humid range with fresh air exchange several times per day, rather than swinging hot and wet. A simple routine for small batch humidity tracking helps you connect what you see on the caps to what the room was doing overnight.
Clarity of the Visual Reference You Use
Since harvest cues are visual, the guide you learn from should show real photos at multiple ages, not just one perfect specimen. Look for close ups of young versus mature caps, underside gill shots, and cluster views that show how edges lift over time. Clear labels for indoor grown versus outdoor found examples help you avoid confusion.
Weigh usability for your experience level and budget. Beginners do better with plain language, side by side comparisons, and safety notes about lookalikes if you also forage. More experienced growers may prefer deeper detail on species variation, spore prints, and storage behavior after picking. We evaluated both example titles below for photo clarity and beginner friendliness, not for recipe content.
A few options that show the range of illustrated references home growers often use for harvest cues:
This article contains affiliate links. If you buy through one of our links, FungiPop may earn a commission at no extra cost to you. Commissions never influence which products we recommend or how we rank them. Read our Affiliate Disclosure for details.
Quick Picks at a Glance

Prime How to Forage for Mushrooms without Dying
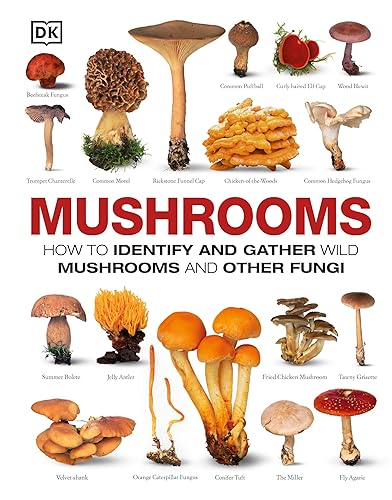
Prime Mushrooms: How to Identify and Gather Wild
As an Amazon Associate we earn from qualifying purchases. Product prices and availability are accurate as of the date/time indicated.
Pros
- Perfectly tailored for absolute beginners with no prior mycology background
- Photographic, plain language approach makes field identification faster and less stressful
- Strong safety first focus builds confidence while respecting real risks
- Compact and portable format works well as a trail companion
Cons
- Covers only 29 species, so experienced foragers will need a more comprehensive reference
- Compact trim size means photos and text can feel small for detailed study at home
- Not a deep scientific textbook, so readers wanting taxonomy and advanced keys may want more
How to Forage for Mushrooms without Dying by Frank Hyman is an accessible photographic guide built specifically for absolute beginners. It focuses on just the 29 wild edible mushrooms you are most likely to find, making it ideal for hikers, campers and curious cooks who want a safe start.
The standout strength is Hyman's folksy, memorable teaching style that turns safety checks into easy field rules. His slice test for morels and clear comparisons to toxic false morels and other lookalikes help you make confident decisions quickly outdoors.
At 256 pages with full color photos, the Storey Publishing paperback feels sturdy yet portable for a backpack or tote. The compact 5.5 by 6.95 inch trim and clear layout make it easy to flip to a species while on the trail.
The narrow focus is both a benefit and a limit, since seasoned foragers will outgrow 29 species quickly. Readers wanting deep mycology, microscopy or extensive keys will also find this intentionally simple and will need a second reference.
Overall, this is one of the friendliest entry points into mushroom foraging with a strong safety mindset. If you walk in the woods and want to learn what you can safely eat without getting overwhelmed, this is the guide to buy first.
Publisher: Storey Publishing, LLC, Publication Date: October 5, 2021. Language: English with 256 pages of photographic instruction.
ISBN-10: 1635863325, ISBN-13: 978-1635863321. Trim size: 5.5 x 0.8 x 6.95 inches with a portable paperback format.
Category strength in Foraging, Mushrooms in Biological Sciences and Biology reflects strong reader trust for beginner use.
Pros
- Extensive coverage of 450 plus species with high quality photos and annotations
- Easy to use visual keys and charts that simplify identification for beginners
- Strong focus on safety with clear edible versus poisonous distinctions
- Durable, beautifully illustrated DK format built for long term reference
Cons
- Bulky 2.64 pound size is better for home study than carrying in the field
- 2013 publication means some names and taxonomy may be dated
- Advanced microscopic species sections may overwhelm absolute beginners
DKs Mushrooms: How to Identify and Gather Wild Mushrooms and Other Fungi is a comprehensive 360 page reference covering over 450 species from around the world. It is built for curious beginners, hobby foragers, and experienced mycologists who want a reliable visual identification system.
Real world performance centers on visual identification, with clear photographs, cross sections, scale illustrations and ID charts for every entry. You learn to assess caps, stems, gills, texture and color, plus habitat and fruiting details to distinguish edible species from poisonous lookalikes.
The DK design is large, colorful and highly organized, with annotated images and anatomical breakdowns that make complex fungi easy to understand. At 7.5 x 9.5 inches with solid construction, it feels like a durable home library reference rather than a pocket field manual.
The main drawback is portability, as the size and weight make it better for study at home than carrying on the trail. Some taxonomy reflects its 2013 publication date, so serious hunters should cross check local regulations and recent guides for updates.
Overall, this is one of the best visual mushroom guides for building confidence and safety knowledge before you forage. If you want an authoritative, beautifully illustrated book to identify fungi accurately, this DK edition is an excellent pick.
Publisher: DK, Publication Date: July 15, 2013, Language: English, Print Length: 360 pages.
ISBN-10: 146540855X, ISBN-13: 978-1465408556, Dimensions: 7.5 x 1.11 x 9.5 inches, Weight: 2.64 pounds.
Category Ranking: Number 2 in Mushrooms in Biological Sciences and Number 11 in Outdoors and Nature Reference, ideal as a home reference and study guide.
Use this book as a study tool before you head out, focusing on poisonous lookalikes in your region and key cap, gill and stem traits. Compare multiple photos, cross sections and habitat notes rather than relying on a single image.
This guide is best for learners who want visual confidence and foundational mycology knowledge. Pair it with a local foraging group, regional checklist and expert confirmation before consuming any wild mushrooms.
Matching Gear to Your Grow
Your setup shapes how you watch and when you act. Use these scenarios to match the level of visual detail you need, and see how the example books fit different styles of learning.
If this is your first countertop kit with blue oyster, keep it simple and visual. You need clear photos of edge curl and flattening, plus a basic rule for cutting the whole cluster at the base. How to Forage for Mushrooms without Dying can help here because its beginner first approach emphasizes careful identification with photos, which trains your eye to notice cap age even though it is written for outdoor finds rather than indoor kits.
If you harvest small batches weekly for fresh meals and drying, you need a broader visual library across species and ages. You are comparing pearl versus pink versus blue oysters, deciding whether to pick a day early for firmer slices. Mushrooms: How to Identify and Gather Wild fits that need as the more encyclopedic, higher-end pick for photos and species coverage, though you will still need to adapt outdoor timing notes to your indoor conditions.
If you fruit in a Martha tent or fruiting chamber with stacked clusters, prioritize spore awareness and second flush planning. Harvest the first cluster as soon as dust appears on lower caps, clean the shelf, and let smaller side pins mature without letting the whole tent get powdery. Either illustrated reference works as backup, but your daily log of cap photos will teach you more than any single page.
Common Mistakes
• Waiting for maximum size. Many new growers wait until caps look huge, but oysters get thin, tough, and spore heavy after the edge lifts. Harvest when most caps are still firm and slightly cupped, even if the cluster could get a bit wider with another day.
• Picking single caps instead of the cluster. Pulling large caps one by one leaves stumps that stall and invite contamination. Use a clean knife to cut the whole cluster close to the substrate, then trim the base, brush off debris, and use or dry the harvest promptly.
• Storing wet mushrooms in sealed plastic. Oysters held damp in a closed bag turn slimy within a day. Pat them dry, line a paper bag or breathable container with a dry towel, refrigerate, and move extra to a dryer within a day for best texture.
Who Should Wait or Buy Differently
A photo identification book is not ideal for you if you only grow indoors and never forage, since much of the page count covers outdoor habitat, seasons, and lookalikes you will not use. It is also not a good fit if you want precise harvest charts for your exact strain and substrate, because indoor timing shifts with airflow, humidity, and genetics. In those cases, put your budget toward climate stability and a drying setup first, borrow an ID guide from the library, and keep a simple photo log of each flush to build your own timing rules.
Frequently Asked Questions
Should I harvest oyster mushrooms all at once or over several days?
Harvest the whole cluster at once when most caps show the right curl and firmness. Selective picking wounds the base and slows the remaining pins. A clean base cut supports a faster and cleaner second flush.
What does it mean if white powder is falling from my oysters?
That powder is a spore drop, a sign the caps are fully mature or past prime. Harvest right away, wipe shelves, and improve fresh air flow. Growers commonly report less dust and better texture when later flushes are picked just before heavy spore release.
Can I still eat oysters with upturned, wavy caps?
Yes, if they smell fresh, feel dry, and show no sliminess or off colors, they are usually still usable, though texture may be chewier. Use them in cooked dishes rather than raw style preparations. Adjust your next harvest a day earlier and note the change in your log.

Write Your Review
No reviews yet. Be the first to share your experience!